|
Pumpkin Center Time era early 1930's - 1960's Missouri Backroad Town |
|---|
Click on a thumbnail to view a photo NOTE: Some photos may require an extra click to view a larger photo |
|---|
|
PUMPKIN CENTER MAIN STREET Pumpkin Center, just a wide spot in the road, set in the back dirt country roads of Missouri where concrete streets are unheard of I built all of these buildings from scratch except for the news stand kit of which my daughter sent me as a gift and one Roundhouse plastic kit which is seen in photo #2 The brick structures were created using molds that I had made from Magnuson kits I had purchased  1 1
 2 2
 3 3
 4 4
 5 5
 6 6
 7 7
 8 8
 9 9
 10 10
 11 11
 12 12
 13 13
 14 14
 15 15
 16 16
 17 17
 18 18
 19 19
 20 20
 21 21
 22 22
 23 23
|
|---|
|
TOADSUCK CANNERY & WHARF AREA This was a very expensive resin kit I purchased but it was one of my favorites I had to scratch build quite a bit of the building out of wood as part of it had defects It was a painstaking job painting and weathering it but I had a lot of enjoyment building it I had quite a time creating the water I began with Woodland Scenics beads that you melted with a heat gun Then I tried Woodland Scenics pourable water that cures like latex rubber I hated both so I removed as much as I could and covered it over with Envirotex Woodland Scenics grass and real dirt were mixed into the Envirotex to produce the proper color As you can see in the photos, it was a real dust catcher The docks were created from wood parts in a Campbell kit All of the rock walls on the layout were of my own design and creation I cut 1/2" wide strips of plaster from 1/4" thick sheets of plaster that I had poured onto a flat surface Each strip was then score about every 3/8" to 1/2" and then the "stones" was broken off the strip Then, if needed, each "stone" was hand carved. Sometimes they came out perfect, other times not I spent countless hours carving the stones while watching TV Each stone was glued onto a board forming the final wall design I wanted Then I created a rubber mold of the stone assembly I then joined numerous of these walls together to create one long wall I sold a lot of my custom plaster walls at train shows I even had a hobby dealer in Cameron, MO buying them wholesale from me  1 1
 2 2
 3 3
 4 4
 5 5
 6 6
 7 7
 8 8
 9 9
 10 10
 11 11
 12 12
 12 12
 13 13
 14 14
 15 15
 16 16
 17 17
 18 18
 19 19
 20 20
 21 21
 22 22
 23 23
 24 24
 25 25
|
|---|
|
ROCKRIDGE WALL AREA The Rockridge wall area is a narrow area located between the railroad tracks and the stone wall All of the fences are plastic, they were modified, painted and weathered Various small structures, people and junk were added I thought this area contributed quite a bit to the layout  1 1
 2 2
 3 3
 4 4
 5 5
 6 6
 7 7
|
|---|
|
SWAKHAMMER WELDING This is a Fine Scale Miniature kit by George Selios It was not finished when these photos were taken  1 1
 2 2
 3 3
|
|---|
|
SEITZ PACKING COMPANY My wife worked for Seitz Packing for over 35 years My layout had 2 Seitz Packing plants, the 2nd one being located in Hill Valley This one was an old 1960's plastic kit and the one in Hill Valley was scratch built  1 1
 2 2
 3 3
 4 4
 5 5
|
|---|
|
PUMPKIN CENTER JUNK YARD I constructed the chain link fences using fine screen wire The screen wire was glued to brass tubing and then was painted silver A resin junk pile was purchased I expanded it by adding numerous car bodies and other junk items to the area You can even see my junk yard dog in one of the photos I scratch built a small sales office building  1 1
 2 2
 3 3
 4 4
 5 5
 6 6
 7 7
 8 8
 9 9
|
|---|
|
A.R. SEED COMPANY This was one of my first scratch built wooden buildings that I built for this layout I highly detailed all of the surrounding area as it was one of my favorite structures When I tore the layout down, I called my friend Dr Spurgat and asked him if he wanted any of my buildings Doc came over and he took this building and a couple others for his layout I am glad it got a good home  1 1
 2 2
 3 3
 4 4
 5 5
 6 6
 7 7
 8 8
 9 9
 10 10
 11 11
 12 12
 13 13
 14 14
|
|---|
|
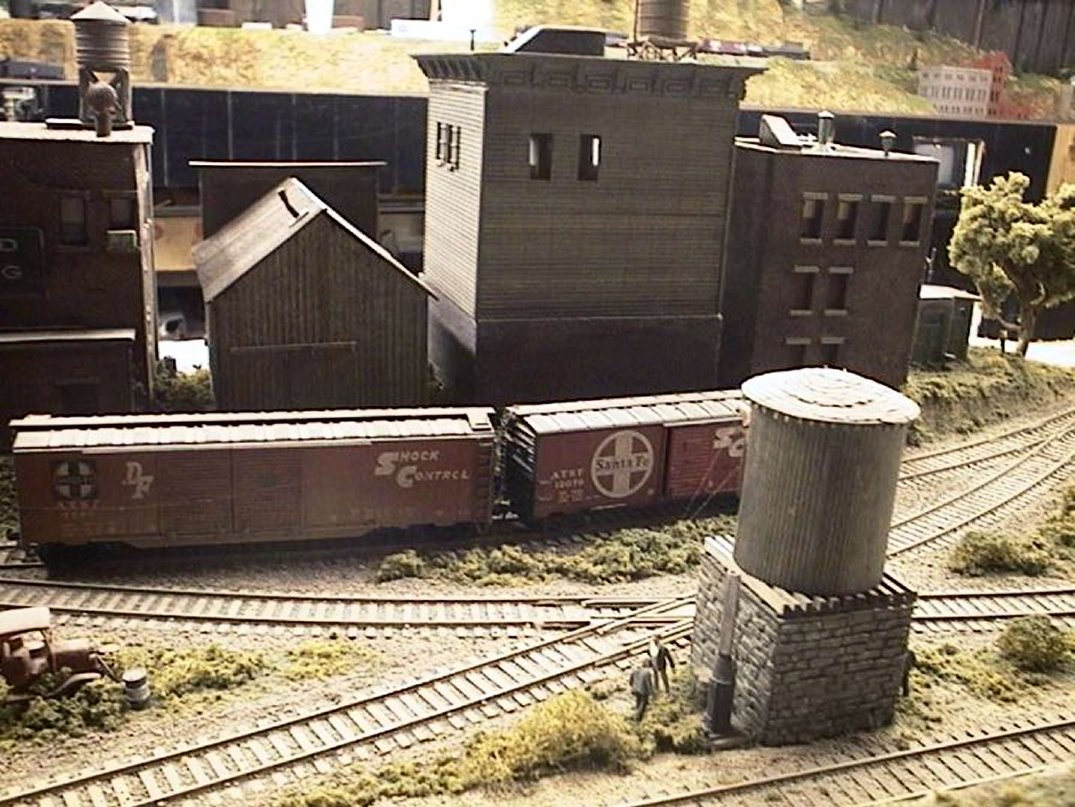
MID TOWN AREA Most structures are built from scratch The large warehouse in photo #12 is a Campbell kit The tall water tower is a plastic kit I purchased The old water tower is an Atlas water tower covered with scale wood planks and the base was made using my stonework The Palace hotel was constructed of cast plaster walls that I poured from molds  1 1
 2 2
 3 3
 4 4
 5 5
 6 6
 7 7
 8 8
 9 9
 10 10
 11 11
 12 12
|
|---|
|
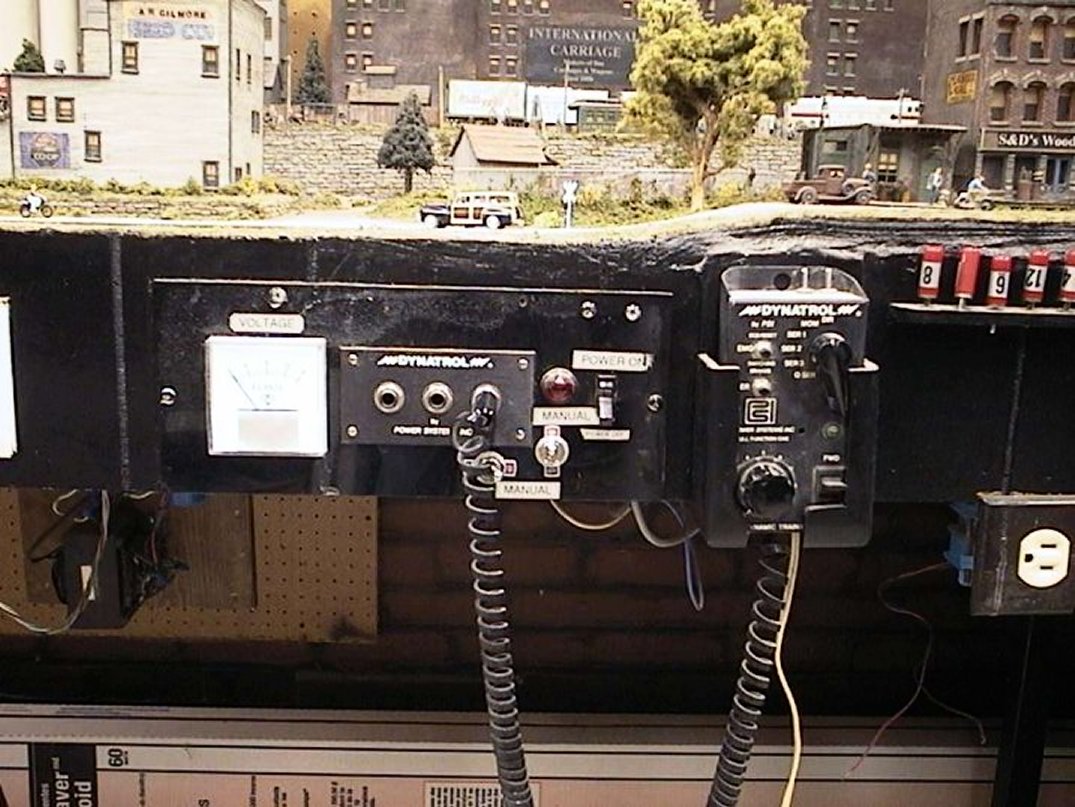
SOME OVERALL VIEWS These photos were taken a few years before the layout was razed Beneath the tables I kept all of my Model Railroad magazines I had 4 different ones I had been saving since the late 1950's until the present day I took them all to the city dump when I had the basement floor carpeted I had 2 methods that I could run my layout with, but only 1 method at a time I powered my standard railroad engines that did not have a remote receiver installed by a huge DC transformer and a 1950's throttle lever I could flip a main switch and then run the locos by remote control When using the remote control, the tracks became live with constant electricity All non-remote control locos had to be taken off the live tracks or they would take off in full speed I had designated sidings for such locos and was able to kill the power on those sidings I had one of the very first remote controlled systems, DYNATROL It was a very expensive & primative system. I could operate 3 locos at the same time The red plugs mounted in the little racks were numbered which matched the receiver inside of the locomotives To run a certain locomotive, I plugged in a red plug into the hand controller and that loco would come alive The new remote systems cost a fraction of what I paid for my Dynatrol Plus the new systems were a lot better, easier to install & easier to operate I had a miniature camera that was powered by the rail electricity and I would watch it on the small monochome monitor installed into the table Today, they have really neat small cameras, another reason I wish I still had my layout  1 1
 2 2
 3 3
 4 4
 5 5
 6 6
 7 7
 8 8
 9 9
 10 10
 11 11
 12 12
 13 13
 14 14
 15 15
 16 16
 17 17
 18 18
|
|---|
| Back to Rick's Railroad Menu |
|---|
| Back to Rick's Harley Stuff |
|---|