

 > >
 > >
 > >
 > >I purchased my 8" Meade LX200 SCT telescope in September 2000. I decided to build an 8'X10'
observatory on October 14, 2000 because it would take me over an hour to align & setup my telescope along with
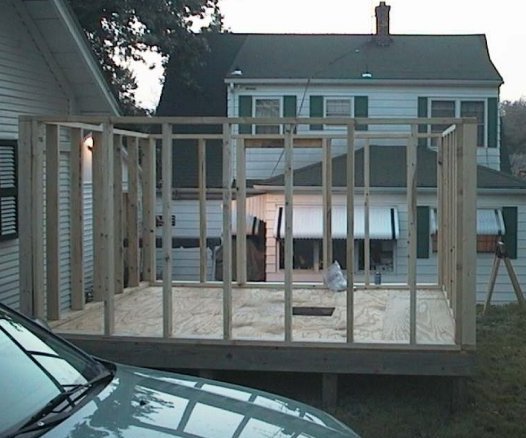
all of the related equipment each time I wanted to use it With the telescope permantly mounted in a backyard observatory, I could be operational in a matter of minutes The only available area for viewing was on top of a 5 foot high back terrace The 1st photo shows our 2 story house that somewhat blocks my western sky. As you can see, the southern sky is pretty much obliberated because of one of our garages. I can view over the top of it however The floor is raised 15" off the ground. Shown are 4 photos of the basic framework & 3/4" plywood flooring. The walls are 60" tall as the roof will be a roll-off design Lesson Learned: I should have made the walls at least 72" tall |
|---|
 > >
 > >I covered the framework with 11/16" particle board sheeting Regrets: I should have used the sheets of 3/8" Masonite siding that comes prepainted - I found out later the costs were close to the same price and would have looked alot better |
|---|
 > >
 > >
 > >
 > >
 > >I now have the door installed, the roof built, the telescope pedestal installed, electrical wiring
and telephone cable installed. The telescope will mount on the black pedestal. Red & White lights have been installed. The red is for night vision and is controlled via a variable lightswitch so I can vary the illumination. The white light rarely is used but nice to have. The pedestal is a 9" diameter steel tube that is buried 4' into the ground with 12" of concrete surrounding it |
|---|
 > >
 > >
 > >
 > >
 > >
 > >
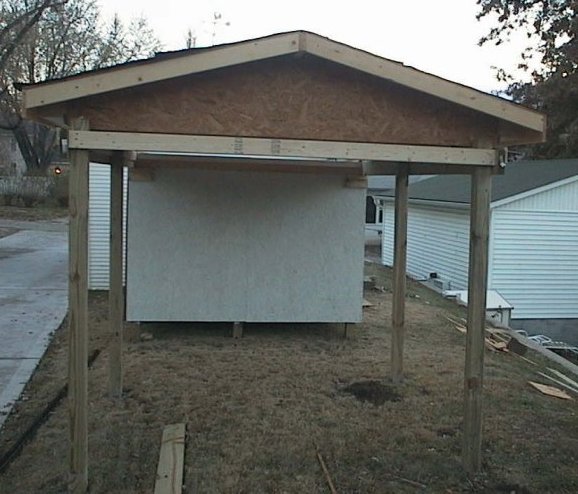
 > >Two 2x6 Timbers support the roof in the slid-off position Finally, The roof now rolls open & closed but since it is so heavy, it's difficult sliding it open Since we were rushing against snow & other winter weather, the roof was just tossed together and tar papered It slides 12 feet to the north, clearing the building Regets: I should have made it to slide another foot further out as it slightly obstructs the northern view slightly, but I am still able to sight in Polaris when the leaves drop from the trees |
|---|
 > >
 > >
 > >. |
|---|
 > >
 > >
 > >
 > >
 > >
 > >Since the roof had been built incorrectly for supporting a steel roof, all trusses had to be removed and re-assembled using another method of support. The light blue underside is 3/8" foam sheeting Not only did this lighten the roof tremendously, it also added lots of headroom with the roof in closed position I then installed the two 20 foot long angle iron tracks on top of the 2x6 support tails for the roof to glide on With new 2.5" steel wheel assemblies installed, the roof now glides off easily with one hand. In fact, a good stiff breeze will slid it I had to install a removable roof stop on the east wall. I left the BYO unattended one day for 15 minutes with the roof in the open position. Upon returning, the wind had blown it almost closed, striking my scope which was pointing upward. Luckily, no damage was done to the scope Wall to wall outside compatible commercial grade carpet was installed which makes it nice on the knees when crawling around beneath the scope In these photos, the interior is in the process of being painted green The next major step will be possibly installing white vinyl siding Regrets: I wish I had chosen white steel roofing rather than dark green. I have measured temperatures as high as 110F with the BYO shut up all day. White roofing would have absorbed less of the sun's heat |
|---|
 > >
 > >These are 2 of the 4 metal tie downs I installed to keep the roof locked closed It also prevents wind from lifting the roof off. We get some pretty windy days here in Missouri  > >
 > >I am currently painting the exterior walls, interior walls, rails & posts green. This will improve the looks until I can side the structure with vinyl siding  > >Always looking for a flashlight - so I built a holder for both red lense flashlights with room for 2 standard flashlights if I need them  > >Tele-vue Qwik Point (wasn't impressed with it, replaced it with a Telrad later)  > >Rear shot showing the Azmuth adjustment screws I rigged up. The screws on each side allows very minor left & right adjustments to the wedge. The 1/4" wire surrounding the base was constructed for hanging my Meade hand controller onto  > >This is my new Black Cat CCD Autoguiding camera. It will preview your targets on your monitor in real time, making it very simple to focus. It has a LUX of .1 to .00009 and shutter speeds of 1/60 to 100,000 sec. Photos taken with this camera can be seen in my photo album 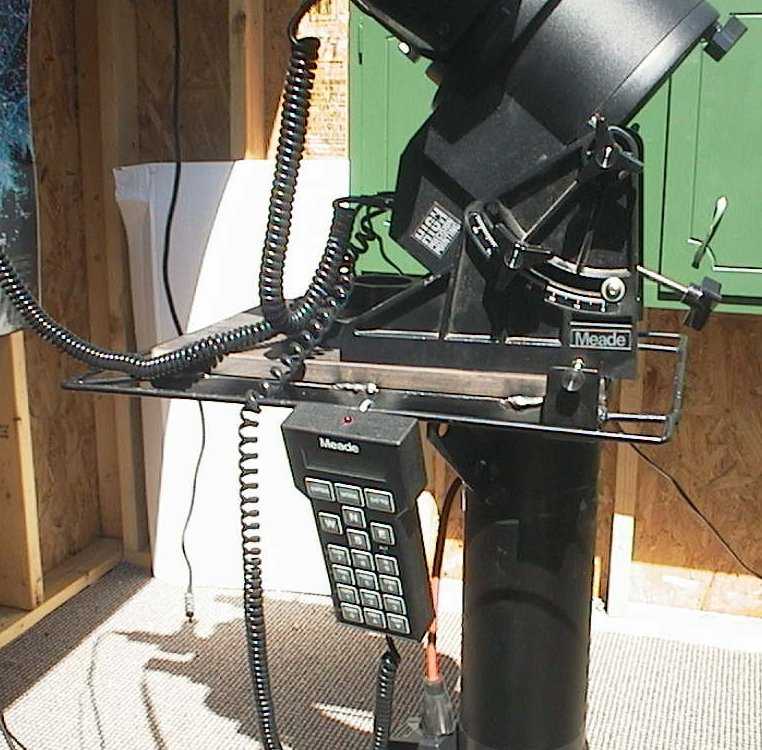 > >
 > >
 > >Side views showing the double 3/4" steel plates that hold my wedge Regrets: I should have installed more electrical outlets when construction began, at least one on each wall and one in the floor near the pedestal - lesson learned |
|---|
 > > > >
 > > > >
 > >
The Telrad makes aiming the scope a snap The Milburn Wedge really steadies the scope on the pillar post and makes minor adjustments a snap |
|---|
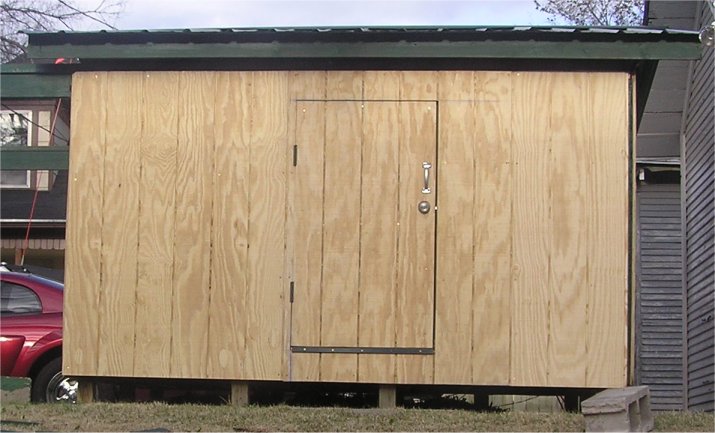 > >
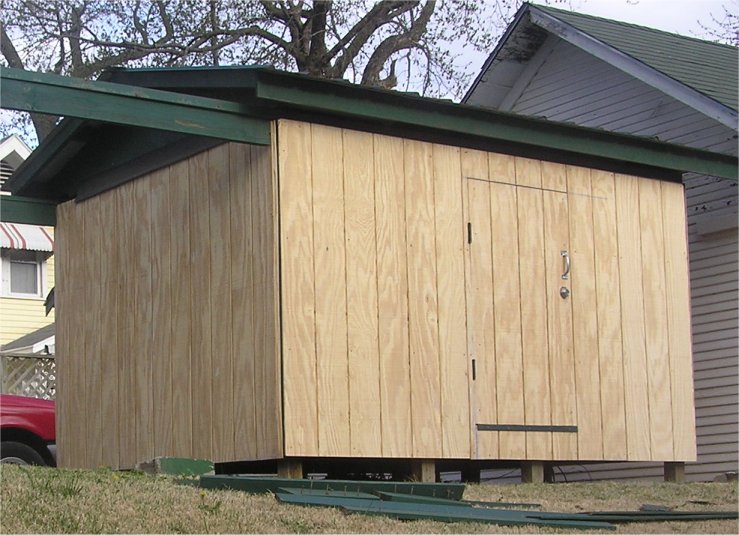
 I put the 8" scope away for safe keeping I have not taken any photos of the new telescope as yet It was now time for new siding. The particle board siding was looking pretty bad from the beginning, so finally I covered it over with some plywood siding Regrets: I could have saved myself a lot of time and money if I had used good plywood siding in the beginning |
|---|
| Back to Astronomy Menu |
|---|
| Back to Rick's Harley Stuff |
|---|